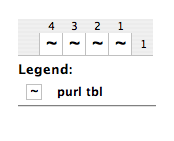
Purl Stitch Through the Back Loop (p tbl)

The purl tbl stitch is the opposite of the knit tbl stitch. When you
look at the wrong side (WS) of single knit fabric,
the knit tbl stitch is the purl stitch. Likewise,
the purl tbl stitch looks like the knit tbl stitch
on the wrong side (WS) of the single knit fabric.
Even though this is a basic knitting stitch, it is a
stitch that many knitting board knitters never learn
because a purl tbl stitch within a pattern can be
obtained through the order you wrap the pegs.
However, if you would like an entire row of purl tbl
stitches, you will need to learn this stitch.
Two different methods for creating a purl tbl stitch
are presented below. The result is the same; use
whichever one is easier for you.
- Moving from the left side of the knitting
board to the right, pick up the wrap on the
current peg with your fingers.
- Bring the working yarn behind the peg from
right to left making an "e-wrap".
- Replace the wrap in your fingers on the peg
above the wrap you just made.
- Repeat steps 1-3 moving to the right across
the knitting board in the order specified for
the stitch pattern.
- Moving from the right side of the knitting
board to the left, pick up the wrap on the
current peg with your fingers.
- Bring the working yarn behind the peg from
left to right making an "e-wrap".
- Replace the wrap in your fingers on the peg
above the wrap you just made.
- Repeat steps 5-7 moving to the left across
the knitting board in the order specified for
the stitch pattern until all of the pegs are
covered.
- Grab the bottom wrap with your knitting
tool from the inside of the knitting board and
pull it up taking both wraps off the peg.
- Place the wrap on your knitting tool back on the peg letting the old wrap fall behind the peg to make a stitch.
- Moving from the left side of the knitting
board to the right, bring the working yarn in
front of the peg from left side of the peg to
right below the existing wrap.
- Continue covering pegs on the knitting
board moving to the right in the order
specified for the stitch pattern.
- Moving from the right side of the knitting
board to the left, bring the working yarn in
front of the peg from right side of the peg to
left below the existing wrap.
- Continue covering pegs on the knitting
board moving to the left until all of the pegs
are covered.
- Grab the bottom wrap with your knitting
tool from the inside of the knitting board and
pull it up taking both wraps off the peg.
- Twist the wrap on your knitting tool and place it back on the peg letting the old wrap fall behind the peg to make a stitch.


